In the previous article, I shared what ESP8266 is and how to use it. If you haven’t read it yet, you can refer to it here. In this blog, I will be giving a quick setup guide to installing and using the Blynk app with ESP8266.
We will also do a small project in which we will be able to control 2 LEDs using an Android App over the Internet. So without any further ado, let’s dive right into it.
Requirements.
Hardware.
| NodeMCU (ESP8266) | Amazon US | Amazon IN | Aliexpress |
| 2 x LEDs | Amazon US | Amazon IN | Aliexpress |
| 2 x 220Ω Resistors. | Amazon US | Amazon IN | Aliexpress |
| Breadboard kit | Amazon US | Amazon IN | Aliexpress |
Software.
Connections to ESP8266:
First, let’s make the connections on a breadboard. Here we will be controlling two LEDs via Blynk so make the following circuit on a breadboard.
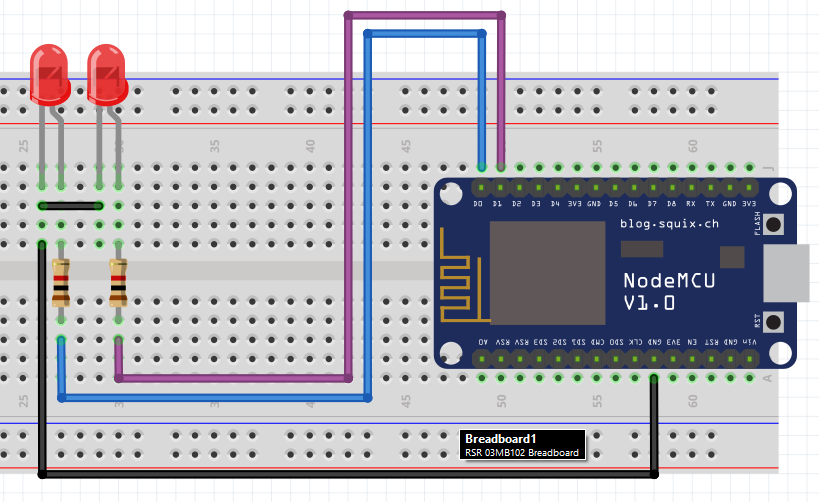
- First LED to D0 of ESP.
- Second LED to D1 of ESP.
- A 220Ω resistor is used in series with each.
Blynk App.
First head to the Play Store or App Store and download the latest version of the Blynk App. Then create an account or sign-in using Google.
- Click on “New Project”

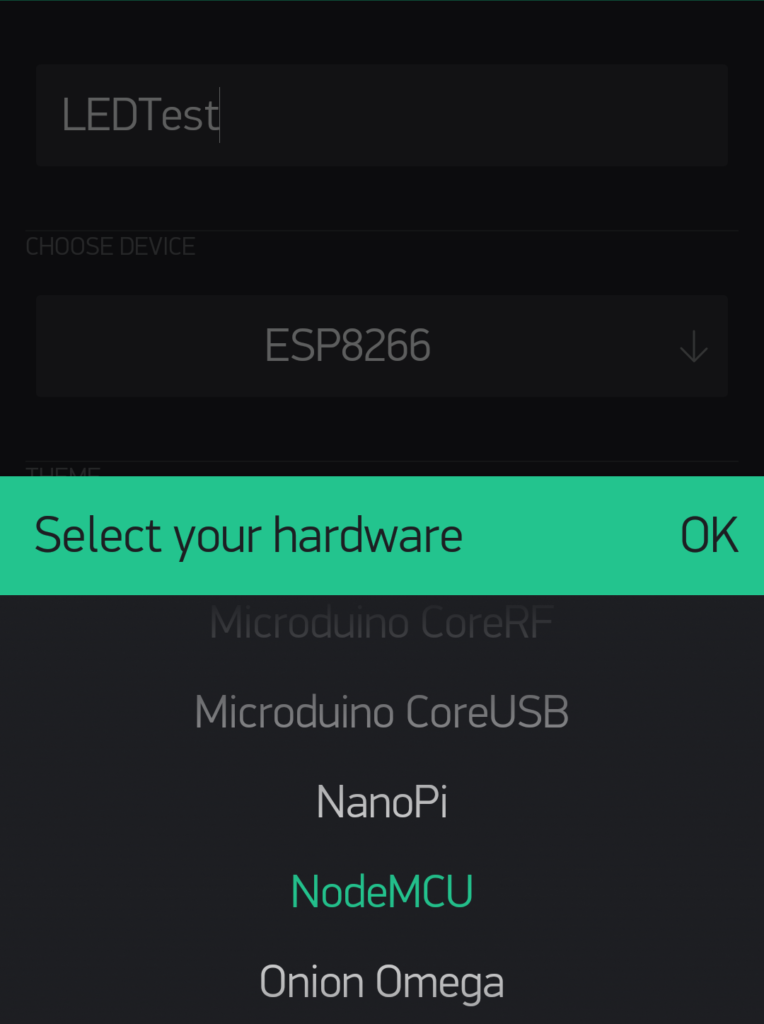
- Give a name to the project. For example, here I have named it “LEDTest”.
- Next, tap on “Choose device” select “NodeMCU” and hit “Create”.
- Now Blynk will send an authentication token to your email address. Just tap on “OK”.
- Go to the ‘+’ button on the top right corner and select “Button”.
- Select 2 buttons as we need to control 2 LEDs.
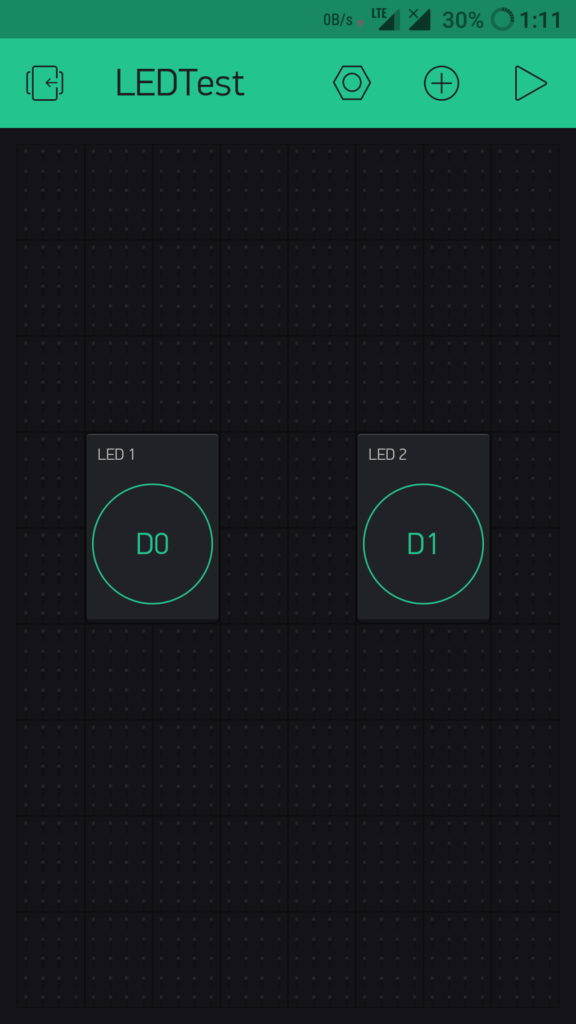
- Click on one button to open it’s settings. Here give the button a name as I have given “LED 1”.
- Select a pin that this button will toggle. Here select “D0”.
- Finally, toggle the mode to switch.

- Do the same for the second button only give it a different name and select pin D1.
Now all we have to do is upload a code to the ESP board and we are good to go.
Setting up IDE and Programming ESP8266:
Before you can program an ESP board with Arduino IDE, Some steps need to be taken. To know what you have to do in more detail, check out this tutorial.
After the IDE is setup to be used with ESP, follow the steps given below to install Blynk libraries.
- First, visit Blynk’s Github page and download the latest release.
- Extract the Zip file and goto the library folder. Copy all the files in the folder.
- Now goto the drive where you have installed Arduino. It is usually in C drive in “Program Files (x86)”.
- Goto Arduino >> Libraries and paste the files copied before.
- Next goto the Blynk folder and into Tools. Copy all the files from there.
- Goto Arduino >> Tools and paste the files.
Now open Arduino IDE and follow the steps below to edit and upload the code.
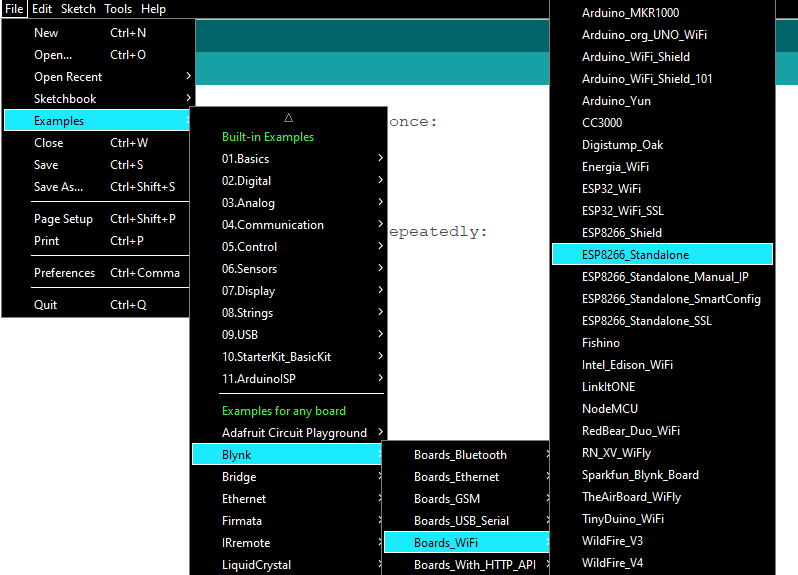
- Goto >> File >> Examples >> Blynk >> Boards_WiFi >> ESP8266_Standalone.
- Add the authentication token received in the mail to the “auth[]”.
- Add the name of your WiFi where SSID is asked.
- And add your WiFi password.
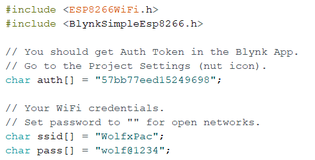
Now connect the NodeMCU board to your PC and upload the code. Make sure you select the correct board and port from the tools.
Video Tutorial.
Check out the above tutorial for more details.
Final Note.
Now we can test the project, first power up the board and wait for a few seconds. It should connect automatically to your WiFi network.
Next, open the Blynk app and click on the play icon on the top bar. This will enable the app and you will be able to control the LEDs with the help of buttons on the app.
That is all for this tutorial. I hope you learnt something new. If you liked this article and want more like it subscribe to our newsletter to stay updated with latest posts.
Don’t forget to check out our Social media pages:
